
Specifications:
Powertrain: 2 XL motors
Turret traverse: M motor
Gun elevation: M motor
Engine: M motor
Control: Sbrick
Suspension: HVSS
Instructions available here
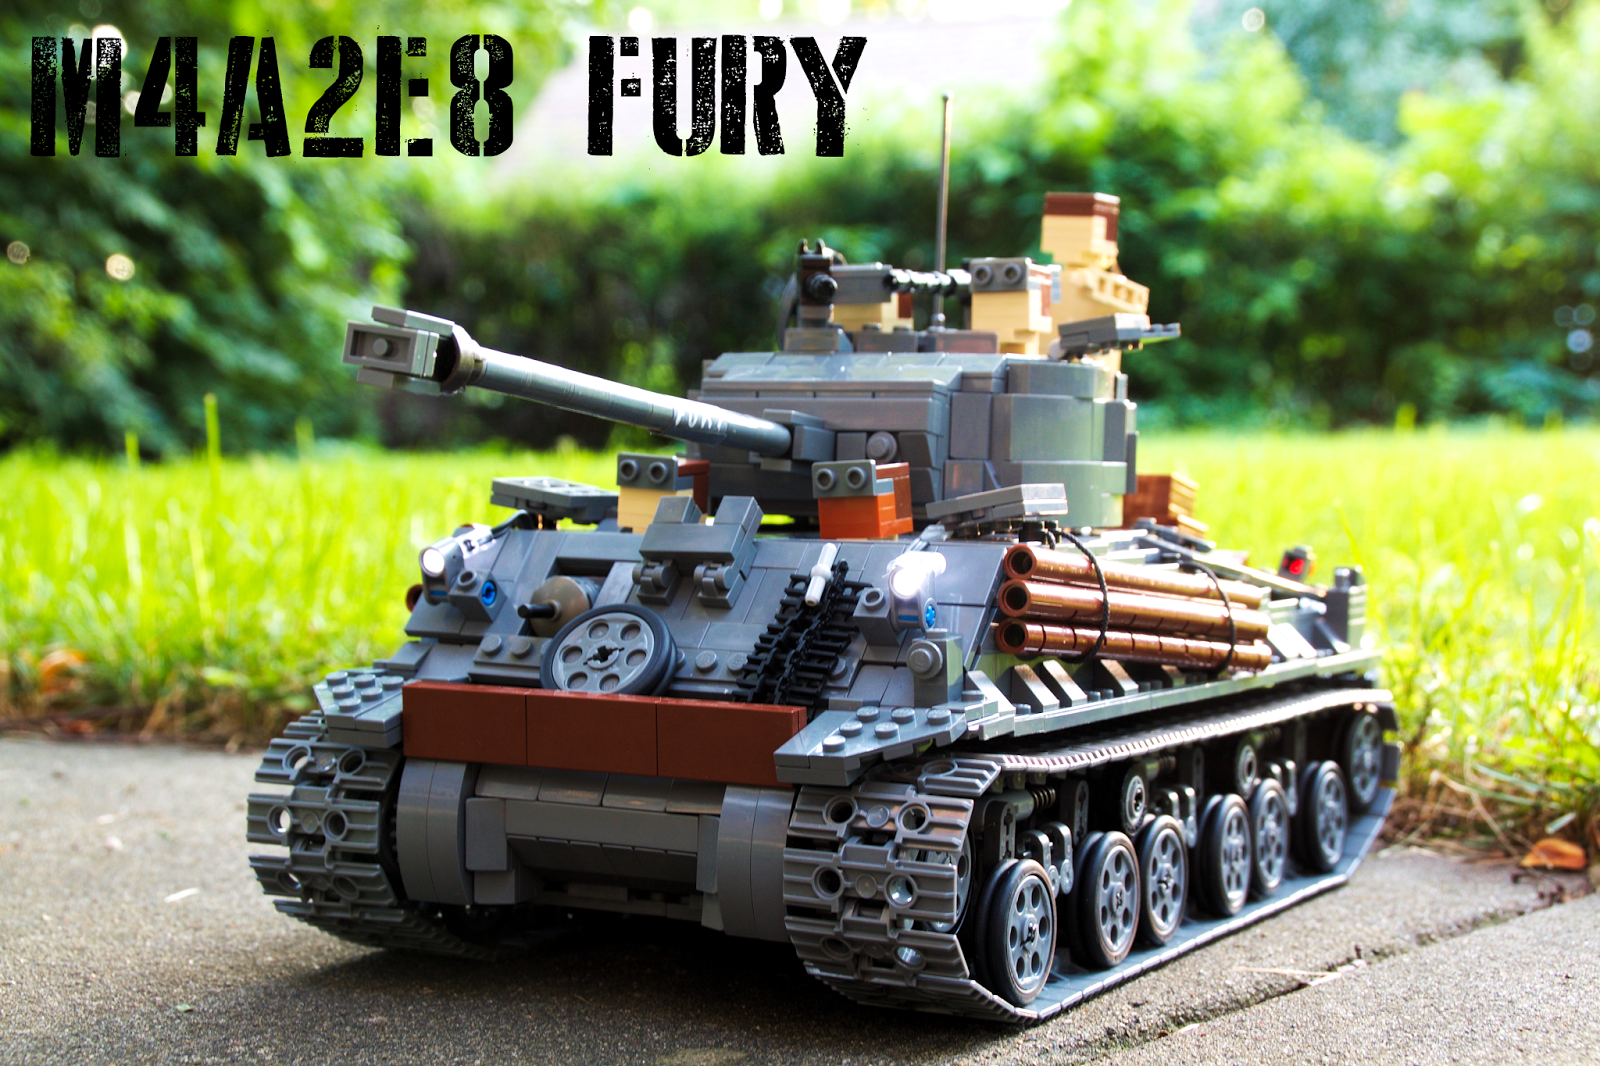
Redesigning the hull and turret of the Sherman tank proved to be a challenging task, as I wanted to include all of the basic functions of the tank, and include enough space for a detailed engine bay. The biggest challenge was incorporating all of the motors in a small space,
the XL drive motors are located near the middle of the hull. This allowed the battery to be placed in front, to allow for easy access. The turret traverse/elevation mechanism is even smaller than the one used in my Sherman Crab. After mounting all of the crucial components, the drive motor for the GM 6048 engine was connected to a M motor located to the left of it above the XL motors. The main priority for the design of this model was to retain most of the detail from the exterior of the hull. The shape of the hull is relatively simple, though the structure of the cast transmission housing, and the sloped engine deck are some of the more difficult parts to create with Lego parts. Though the biggest challenge of the exterior is the turret, it's a cast component that has complex curves on the sides and mantlet. Its design required lots redesign and scaling to correctly match the curves. One of the nice features of the HVSS (Horizontal Volute Spring Suspension), is that it's entirely external, and allows more space for the internals of the model. With the extra space, I was able to include switches to toggle the engine and headlights on and off.
A short summary of the film, it contains spoilers.
The film FURY graphically depicts the brutality faced by American armor, the superior Axis armor and technology made war on German soil difficult. Most of the major threats to Allied tankers is shown, hidden anti-tank emplacements, portable anti-tank shaped charge projectiles, Axis armor, and landmines are all of the many threats that FURY encounters in a single day of fighting. The film shows the close relations between a tank's crew, and the hardships faced together. The films three main distinct scenes that I chose to replicate are the entering the city, tiger battle, and the crossroads. The city scene involves the horrors of close quarter battles along narrow streets. Where the presence of German troops lurking in alleys and buildings. In the tiger battle a real Tiger I was used, and it knocked out a platoon of Shermans, leaving Fury in a duel against it. The final scene of the film was also chosen, as this is when FURY is rendered immobile due to a landmine at a crossroad. Then the finale of the film occurs, when FURY's crew realizes a German SS battalion is marching towards them, a long drawn out battle occurs and eventually FURY is overrun and outnumbered.
Fury entering the city

The tiger battle

The tiger battle was created with Sariel's Tiger XL

At the crossroads

The finale

One of my priorities when designing this model is I wanted to include space for the crew members, so when hatches are open, the crew can be placed in their positions as in the film. Lego's miniland figures are nearly the perfect size for this scale, as they are 1/20th scale, and this model is 1/18th scale. Additional stowed items were added to the rear of the vehicle, like in the film, this provided more color and detail to a rather simple, flat area. The addition of logs, a road wheel, and extra tracks added more detail to the upper glacis. This area took several renditions, to make it correctly match the angle of the real vehicle. The transition between the upper glacis, and transmission housing was a challenge, as I wanted to retain the details of the bolts for the transmission housing, as these are used to affix the whole transmission to the front of the real vehicle; this allowed for rapid infield replacements, if the transmission was knocked out.

This rendition of the Sherman is very close to being perfect, though with an overlay of blueprints, some minor changes could be made, by shifting the upper half of the hull backwards one stud, and maybe replace the tracks with custom four stud wide versions. I would like to potentially modify the design, and create a modular system for the Sherman, as I originally foresaw prior to creating my Sherman crab variant of the M4A2. This would include the both HVSS, and VVSS suspension options;The choice between the early D50878 turret with the 75mm gun, or 105mm howitzer. A modified D50878 turret bustle for the 17 pounder used on the firefly, or The late T23 turret with the 76mm gun, and modified mantlet for the M51 Super Sherman's 75mm gun. The ability to modify the hull between the long, welded hull, early welded hull, and cast hull could also be options, though designing a cast hull may prove to be a challenge. Potentially the option to change the front transmission housing could be an option, though for the early three part housing, the structure may prove to be difficult. Finally different powerplants could be chosen, though there will be some serious design challenges to make the 30 cylinder Chrysler muiltibank engine, and a continental radial engine fit. Though a Cummins V8 engine wouldn't be too difficult to make for the M51 Super Sherman. Though this may be a long term project, due to the complexity of some of the designs. This project has been fun to work on, and it taught me a lot about the differences between the Sherman variants design. I am proud to have made major changes to my old Sherman Crab's hull design, and maybe a potential option for the modular system would be to replace the space with drive motors for the Crab version, and for a pneumatic bulldozer version.


Video:
More photos:


Can you send me detailed pictures of the suspension, i want to learn this technique.
ReplyDeleteHere's a couple photos of it, the spring is placed on the on the top of it, and the Technic beam and brick can be any size, the ones that are there are just placeholders. http://www.bricksafe.com/pages/Tommy_styrvoky/fury
DeleteThank you!
ReplyDeleteAre you going to issue an instruction?
ReplyDeletei have the following mesage when opening LDD :
ReplyDeleteyour application was not able to open a license because the FLEXnet license server manager (etc ....)
Why ?
I don't know, maybe there's some issue with the license server is down. It's not an issue with the file, maybe try a fresh install of LDD, and see if that fixes the problem, or maybe it's being blocked by firewall/needs permissions. As I have never encountered that issue. If it still persists, then it's probably an issue on Lego's side. http://ldd.lego.com/en-us/
DeleteМожете отправить инструкцию по сборке?
ReplyDeletecan you send the assembly instructions?
ReplyDeletehttp://www.rebrickable.com/external/view/?action=BI&url=http%3A//www.bricksafe.com/files/Tommy_styrvoky/m4a2e8-fury/M4A2E8%2520Fury.lxf&designer_id=34286&set_num=MOC-6562
DeleteCould you please tell me how you created theneccessary sBrick Controller
ReplyDeleteIt's a 3rd party part that works with bluetooth. More information about it here. https://www.sbrick.com/
DeleteSorry, my question wasn't precise. I already bought a sBrick and activated it with Bluetooth but I cannot find the software for a controller for steering, acceleration and turret turning. How did you make this? Regards - Christian
DeleteThere is an app for both Android and Iphones. Just search for Sbrick in either the app store or the google play store.
DeleteHi,meanwhile I'm one step closer to a solution because I found the Profile Designer and created a profile similar to yours. I saw that you use a joystick and two sliders. Would you please tell me the settings for these functions. The joystick has the prefilled settings X - Steering and Y - Acceleration and the Sliders CH Channel and Slider. To which of the three Units did you put what settings and functions? Many thanks in advance and sorry for my many questions but I'm a really amateur in such things. Best regards - Christian
ReplyDeleteI used a joystick, and then rotated it by 45°, then you can put the motor inputs in to the two channels. It may require some tinkering to get it to work correctly, but basically it behaves like a a dual differential steering mechanism when finished.
DeleteOkay, I will try it. And what's about the two sliders?
DeleteJust have two sliders, rotate the one for turret traverse 90°, and leave the gun elevation one as it is. You can change the maximum output value of the sliders from +/-1 to a smaller value if you want the motors to turn slower at maximum position for better control.
DeleteHi Tommy, I love your work and appreciate the time you put into the instructions. I have built your M4A3E8 "Fury" , but the only problem is when it encounters resistance when turning, such as grass or a carpet, the torque of the engines breaks the drivetrain and forces it and the battery pack up through the front glacis. Am I missing a cruicial part of its structure?
ReplyDeleteThanks,
Matt.
Hi. Can you please make a completed schematic? When I make it into instructions mode on the brick program, it does not include the drive train and or the engines inside of the tank. Can you make a completed one? thanks.
ReplyDeleteHello can You please make or issue a set of instructions please I only ask because i couldn't find any other way to gain a set i understand if it isnt possible. i love the design of it
ReplyDeleteHow do I get your instructions?
ReplyDeletehello can you also use the lego power functions reciever istead of the s brick
ReplyDelete